Cauliflower Rice Sushi
Ingredients
Cauliflower "Rice"
- 1 head cauliflower small-medium (~800 grams), washed and trimmed
- 2 second spritz Olive Oil Cooking Spray
- 1/4 tsp fine sea salt
- 1/8 tsp Stevia
Caramelized Onion
- 2 second spritz Olive Oil Cooking Spray
- 2/3 cup yellow onion diced
Salmon Fillling
- 1 can salmon 213 gram can (drained)
- 1 tbsp mayonnaise half fat
Sushi Roll
- 6 sheets roasted seaweed (nori)
- 1 avocado large, sliced into strips
- 1 mango large, sliced into strips
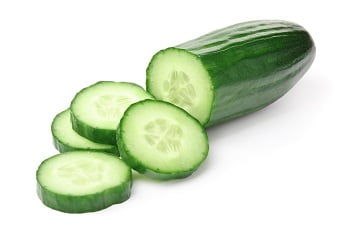
- 1/3 cucumber large, sliced into strips
- 6 tsp sesame seeds toasted
Dip
- 2 tbsp gluten free soy sauce
Instructions
Set-up
- Immerse a sharp, serrated knife in a jug of ice water to cool. Ensure entire blade is in water.
- Set out avocado, mango, & cucumber slices and toasted sesame seeds in preparation for sushi roll assembly.
Cauliflower "Rice"
- Fit food processor with grater blade. Break cauliflower into appropriate size chunks to fit in food processor opening.
- Place cauliflower in a food processor and blitz into small pieces.
- Transfer the cauliflower rice to colander fitter with a large paper towel or absorbent dish towel and squeeze/press to remove excess water.
- Heat a non-stick pan over medium heat; lightly spritz with olive oil spray. Add cauliflower rice, salt, and stevia.
- Cook, uncovered until heated through, 3 to 5 minutes. Transfer to a medium bowl and set aside to cool.
Caramelized Onion
- Using the same non-stick pan as above (which should already be heated), add a light coating of olive oil spray. Add onion and cover. Cook for ~3 minutes.
- Remove lid to stir onions and add 1/3-1/2 cup of water. Stir again and cook, uncovered, for 4 to 5 minutes more until water dissolves and onions have began to caramelize. Set aside to cool.
Salmon Filing
- In a large mug or small bowl, mix salmon with mayonnaise. Set aside.
Sushi Roll
- Place one sheet of seaweed on a bamboo mat (a thick tea towel can also be used if you do not have one). Cover 3/4 of the sheet of seaweed with a 2/3 cup of prepared “rice” (leaving ~1” at one end bare). Spread into an even layer with a rice paddle (or small spatula).
- Horizontally lay a line of salmon, avocado, caramelized onion, mango and cucumber approximately in the center of the “rice”. Sprinkle 1 tsp of sesame seeds over ingredients.
- Starting with the end of the seaweed that is fully covered in rice, roll it up tightly. When you near the bare end of the sushi, dab this lightly with soy sauce to create a seal. Finish rolling, using the sushi mat to shape a nice even roll.
- Repeat steps 1 through 3 until all rolls are formed.
- Slice each roll into 5 or 6 pieces with cooled knife. Remove debris and return knife to ice bath after slicing each roll.
- Enjoy with gluten free soy sauce.
Notes
*While this sushi is best if eaten fresh, it will store for the next day or two in the fridge just fine.

Tried this recipe?Let us know how it was!