As longer and notably warmer days slowly become more of a mainstay in our lives (buh bye winter weather!), one room in our house is usually begging for a little attention – you’ve got it! We’re referring to that faithful food environment; namely your pantry, fridge, and freezer. While spreading the love in the kitchen is always encouraged, the entry of consistent spring weather strikes me as the ideal time to give the nourishing center of your home a solid once over.
With a kitchen full of nutritious fresh and frozen foods you’ll be able to make regular nutritionally sound meal choices to foster a foundation for optimal health. Admittedly this kitchen clean-up can be a big job, especially if it’s your first attempt at this, so we’ve put together a few tips to help you spring clean your food environment this month (and provided a delicious hash recipe to help you use up those soon-to-be-expired ingredients). Feeling ready?! Let’s get our clean on:
1. Get rid of anything that has expired
First and foremost, we encourage you to sort through your freezer, fridge, and pantry and get rid of everything that is past its expiry date and is otherwise inedible (or questionably so). This will help eliminate the decidedly done food items, and create more space for proper organization. If an item is not yet expired, but close to this date, place it near the front of your fridge or pantry so it’s clearly visible and won’t be easily forgotten. We recommend trying to plan your meals over the next few weeks to use these soon-to-be overdue items up – you may need to use some kitchen creativity here. Stir-fries, scrambles, and soups will likely be your friend in this department.
2. Organize your freezer
After you have done some cleaning out of expired foods (hopefully including those long lost frost bitten freezer items), we encourage you to start using your freezer to its full potential from the get-go. This tip is absolutely key to support quick food prep when you don’t have a meal planned – a sigh of relief generally comes when you recall that you froze a double batch of food you made the previous week. Remember, the freezer isn’t just for main dishes – those extra grains and beans that you cooked? Freeze ’em! Just don’t forget to properly cool everything before freezing. Find some meat on sale at the supermarket? Buy extra and keep it in the freezer.

3. Figure out your fridge
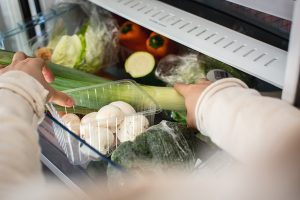
Before hitting the grocery store to fill up this key food storage spot, we encourage you to ensure you head out well prepared. Specifically, arriving at the market with a satisfied appetite and a well thought out food list outlining the key items you will be cooking/eating over the coming days is recommended. To facilitate hassle-free shopping, when making a list we suggest categorizing it in the way you typically move through the grocery store (for example condiments/dressing/sauces, cereals and bread, refrigerated and frozen items, and fresh produce). Not only will this increase the efficiency of your visit, but it will help ensure small items from specific categories are not forgotten (yes, we’re talking about you illusive milk & bread).
Additionally, if you haven’t already, we encourage you to invest in some Pyrex containers or other Tupperware to store prepped food and left-overs (Hint: opt for many of the same type and style for easy stacking). By storing future eats (including leftovers) in ready-to-eat portions, you instantly have lunch or dinner ready to go for future consumption. Having these containers on hand is key to making last minute lunch packing a breeze – they’re also great for carrying snacks, sauces, dressings, overnight oats, and just about anything else you can think of.
 4. Stock your pantry
To help you put your recently purchased ingredients to use throughout the week, we suggest that you ensure your pantry is sufficiently stocked with flavour boosting ingredients (such as canned tomatoes, dried herbs and spices, minced garlic and garlic powder, vinegars, mustard, salsa, hot sauce, jarred hummus, and nut butters). Ensuring your pantry is equipped with non-perishable flavour boosters is a very smart routine to get into to help you continuously use the items in your fridge and freezer.
We also recommend your pantry has a few meal-base staples including canned and jarred fruits & veggies (like unsweetened applesauce, canned pumpkin, asparagus, and artichokes) and protein sources (like tuna, mussels, and jerkeys). This one’s important to keep in mind with a view to staying prepared for unanticipated emergencies as well as last minute meal prep.
5. Label and date, and adopt FIFO
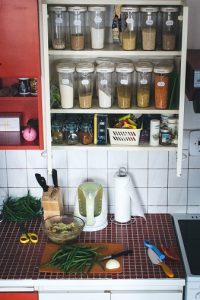
Organizing your fridge and pantry with air tight containers and jars is a great way to store and organize food. Just make sure you label and date them so you know how long you’ve had them for. It’s a simple step that will help you keep things fresh. Specifically, we recommend that you adopt the practice of FIFO – or a first in first out. In other words, ensure you rotate older products to the front so you grab them first, and store newly purchased food items near the back. This practice is especially important to apply to the perishable contents of your fridge (such as meats and dairy). New food that comes in goes in the back of the fridge/pantry, and the older food moves closer to the front. Simple and effective!
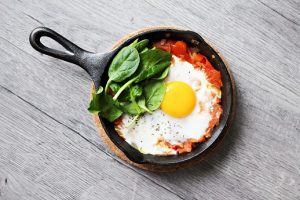
After going through the above steps, how do you feel? Is it time for a nutritious and delicious recipe to use-up some of those soon to be expired ingredients lingering? We have just the recipe for you – read on for some inspiration!

Kitchen Clean Out Inspired Recipe – Frozen Kale & Pea Sweet Potato Hash
Vegetarian and Gluten Free
Serves 4
Macros per Serving
Calories: 281
Protein: 16 g
Fat: 17 g
Carbohydrates: 18 g
Sugar: 4 g
Fibre: 3 g
Ingredients:
2 tbsp coconut oil
2 medium sweet potatoes, peeled and diced
2 medium red onions, thinly sliced
1 tsp dried basil
½ tsp sea salt
Zest of 1 lemon
1 tbsp lemon juice
3 cups frozen kale
1 cup frozen peas
8 large eggs
¼ tsp ground black pepper
Instructions:
1. Preheat oven to 350 degrees Fahrenheit.
2. In a large skillet with high sides, heat oil over medium. Add potatoes, onion, basil, and salt. Sauté until potatoes are tender and beginning to brown, ~15 minutes. Stir in lemon zest, juice, kale, and peas.
3. Cook until all ingredients are heated through, ~5 minutes.
4. Using a large casserole dish (or 4 individual ramekins if you prefer – note: this will require you to divide the recipe evenly by four going forward), flatten out vegetables. Crack eggs on top and sprinkle with pepper.
5. Top with lid or cover of some sort (a baking sheet works well here) and cook in the oven until eggs are set with still-runny yolks, ~5 minutes.


